Contents
SMTP stands for Simple Mail Transfer Protocol and is a set of commands that are used to authenticate and direct the transfer of email from one server to another. In setting up your Custom SMTP Settings, you will be choosing to use your own server to send emails, as opposed to the default Value Builder server (sent via The Value Builder System™). Using your own server for email sending means emails will be less likely to be flagged by an email system and more likely to get into your inbox, as it avoids spam issues that could arise or jeopardize the server reputation, should an advisor misuse our server (one advisor sending to a cold lead list and getting flagged as spam will affect all emails with the exact text, in turn flagging all emails of this kind as spam.)
To use custom SMTP Settings, go to Settings > Personal Settings >Email & Notification Settings
For Custom SMTP Server
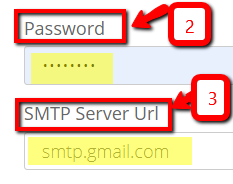
1. Enter the password that is used to log into your email account.
Note: the username is automatically filled and cannot be edited.
2. SMTP Server Url:
- For Gmail: smtp.gmail.com
- For Outlook: smtp.live.com
- For Office365: smtp.office365.com
For a more extensive list of server urls click here.
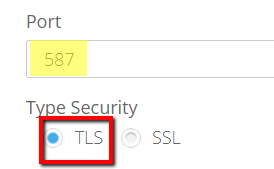
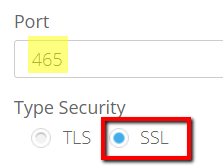
3. Port:
- If Type Security selected is TLS, the port will be 587
- If Type Security selected is SSL, the port will be 465
4. If you want Nurture Cycle emails sent in addition to customer emails, ensure Custom SMTP server is selected under 'Send Nuture Cycle Emails'.

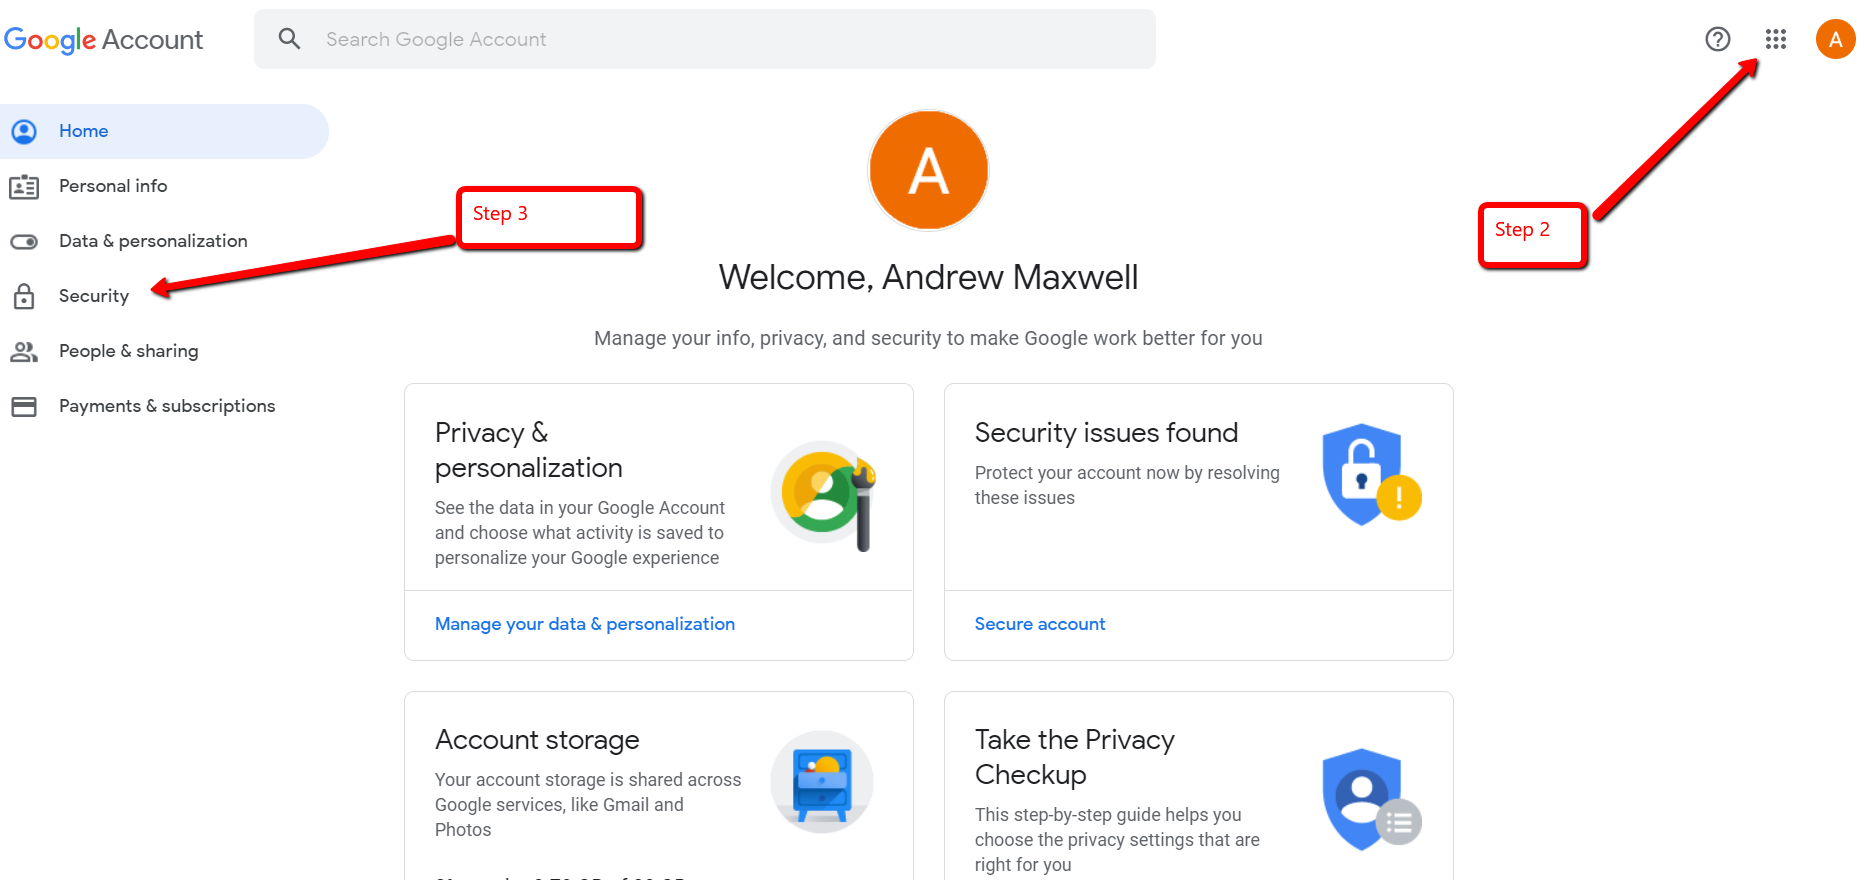
Google may require an additional step for security purposes.
1. Sign in to your Gmail account.
2. Click on the Google Apps icon in the top right.
3. Click on Security.
4. Scroll down to 'Less secure app access' and click on 'Turn on access'
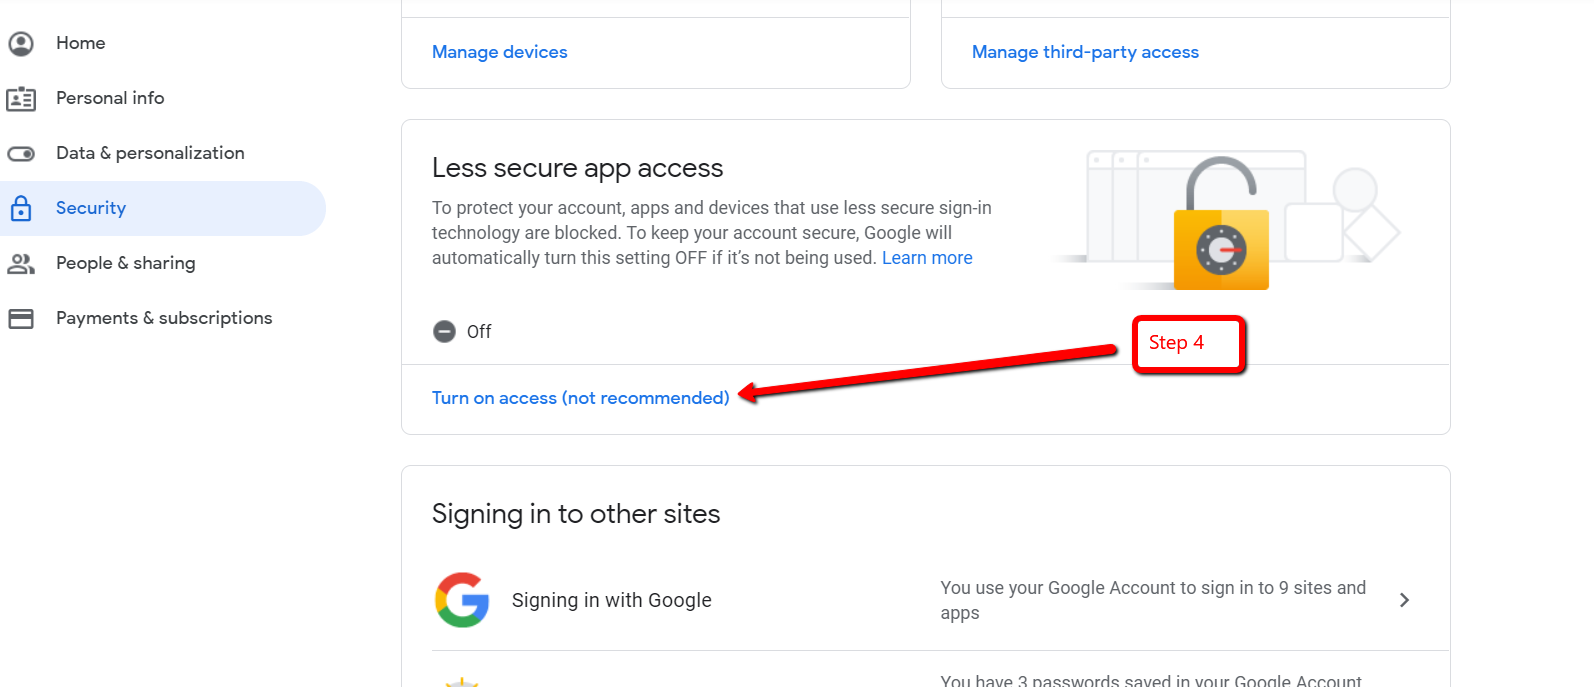
5. Click to turn on, which will be indicated by it becoming blue.
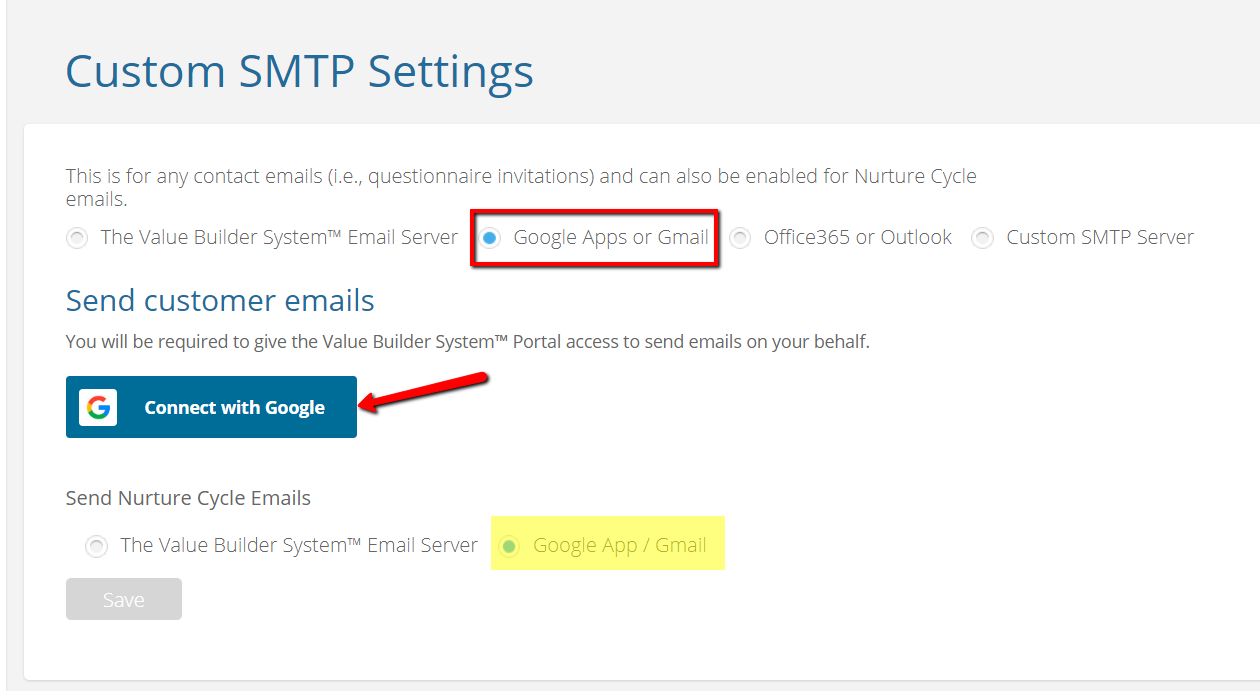
For Google Apps or Gmail
1. Select Google Apps or Gmail
2. Click the Connect with Google button
3. Login to your Gmail account using your credentials
4. You will be required to click "Allow" in order to grant valuebuildersystem.com permission to send emails on your behalf.
5. If you want Nurture Cycle emails sent in addition to customer emails, ensure Google App/Gmail is selected under 'Send Nurture Cycle Emails'.
6. To ensure all configurations are kept, click 'Save'
For Office365 or Outlook
1. Select Office365 or Outlook
2. Click the 'Connect Office365 Account' button
3. Login to your outlook email account using your credentials
4. You will be required to click "Yes" in order to let the app access your info
5. If you want Nurture Cycle emails sent in addition to customer emails, ensure Office365/Outlook is selected under 'Send Nurture Cycle Emails'.
6. To ensure all configurations are kept, click 'Save'

NOTE: You can remove access to any of the App configurations at any time.